# Environment Setup
The following content uses Windows 10 operating system as an example to introduce the download, installation, and configuration of required software.
# Runtime Environment
- JDK 11 + or OpenJDK 11 +
- Redis 4.x/6.x +
- MariaDB 10+, MySql 5.7+, Oracle, SqlServer, DM, etc.
- Nacos 2.0.3 +
# Development Tools
- IntelliJ IDEA
Open source project authors can apply for free license certificates - Visual Studio Code
- Node 16.x/18.x/19.x +
- Maven 3.x +
- Git
# JDK Installation and Configuration
# Download and Install OpenJDK 11
# System Environment Variable Configuration
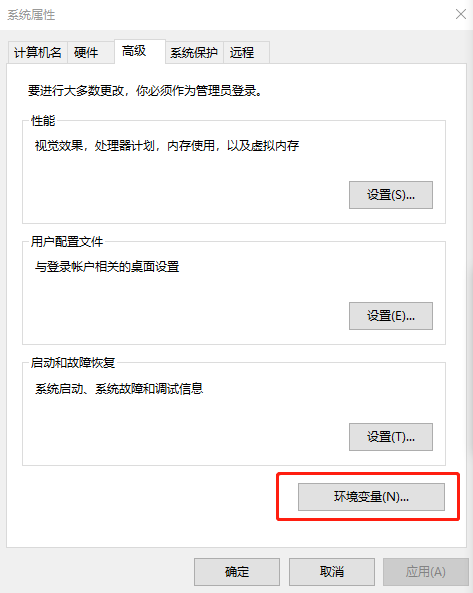
- Win Start - Right-click -> System -> About -> Advanced System Settings
- Configure
JAVA_HOMEC:\jdk-11 directory
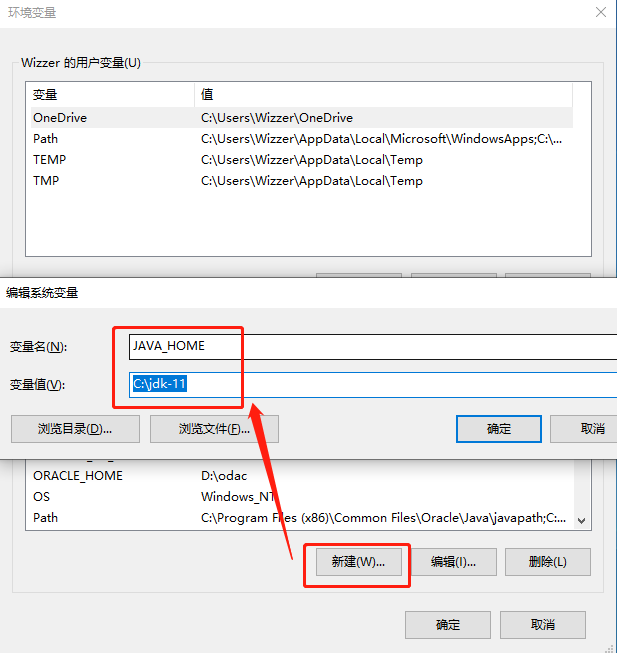
- Configure
PathC:\jdk-11\bin directory

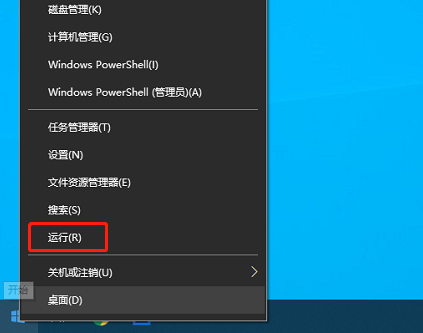
Win + R hotkeyor Win Start - Right-click -> Runcmd->java -versionto check if the configuration is correct


# Redis Installation and Configuration
# Download and Install Redis 5.0.10
Windows/x64 msi https://github.com/tporadowski/redis/releases (opens new window)
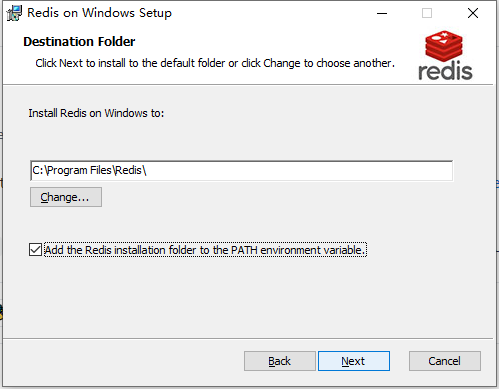
Add the redis folder to the environment variables
- Run
cmd->redis-clito check if Redis is installed correctly

# MariaDB Installation and Configuration
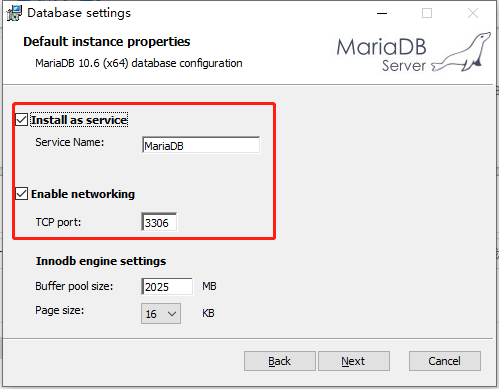
# Download and Install MariaDB 10.6.4
Windows/x86_64 msi https://mariadb.org/download/ (opens new window)
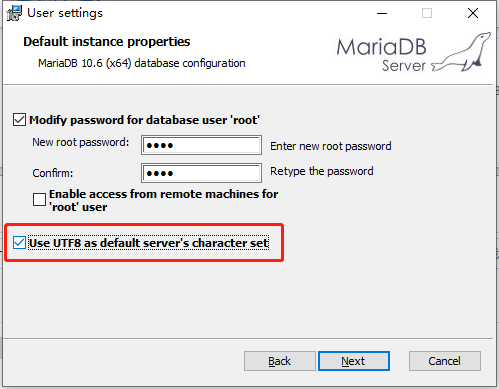
Set the password to
rootThe password can be simple in the development environment, but this password is prohibited in the production environmentUse
UTF8character set by default
# Nacos Installation and Configuration
# Download Nacos 2.0.3
- nacos-server-2.0.3.zip https://github.com/alibaba/nacos/releases (opens new window)
# Install and Configure Nacos
Extract the nacos folder from the zip file to
D:\server\nacosOpen the
D:\server\nacos\bin\startup.cmdfile with Notepad, change the running mode tostandaloneand save the file
set MODE="standalone"
- Open the
D:\server\nacos\conf\application.propertiesfile with Notepad, modify the data source and save the file
### If use MySQL as datasource:
spring.datasource.platform=mysql

### Count of DB:
db.num=1

### Connect URL of DB:
db.url.0=jdbc:mysql://127.0.0.1:3306/nacos?characterEncoding=utf8&connectTimeout=1000&socketTimeout=3000&autoReconnect=true&useUnicode=true&useSSL=false&serverTimezone=UTC
db.user.0=root
db.password.0=root
- Create a
nacosdatabase in the database and import the data, using the HeidiSQL client tool that comes with MariaDB installation as an example
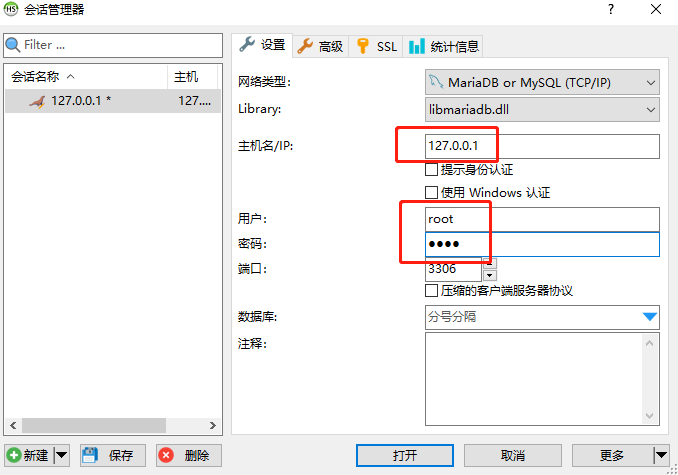
- Select the server-consistent
utf8mb3_general_cicharacter set

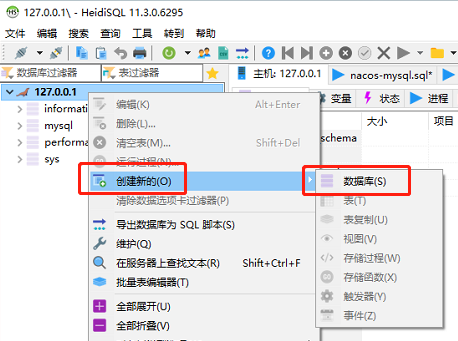
- Select the
nacosdatabase, HeidiSQL menu File -> Run SQL file -> Open and run theD:\server\nacos\conf\nacos-mysql.sqlfile
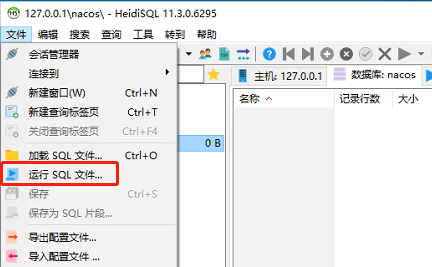
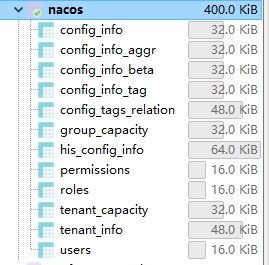
- After execution, right-click the
nacosdatabase -> Refresh, and you can view the related tables
# Run Nacos
Double-click the
D:\server\nacos\bin\startup.cmdfileAfter startup is complete, open http://127.0.0.1:8848/nacos (opens new window) in your browser
Enter username
nacosand passwordnacosto access the management backend
# Maven Installation and Configuration
# Download Maven 3.8.1
apache-maven-3.8.1-bin.zip https://maven.apache.org/download.cgi (opens new window)
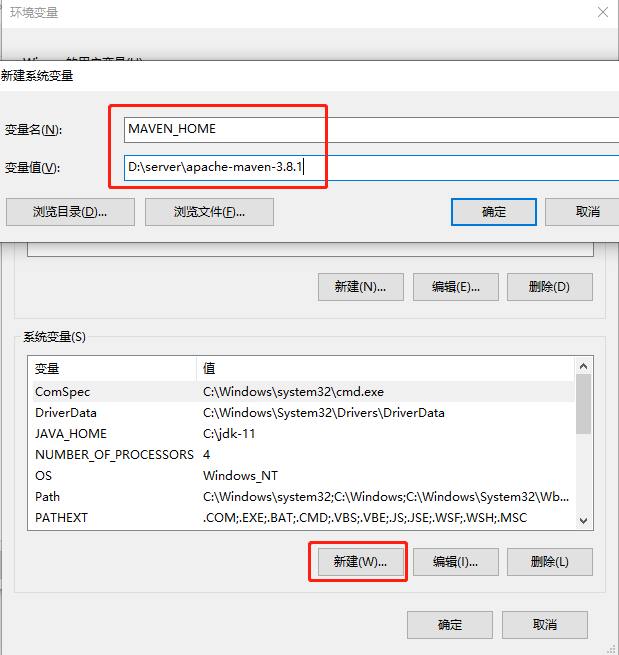
Extract the maven folder from the zip file to
D:\server\apache-maven-3.8.1Configure system environment variables
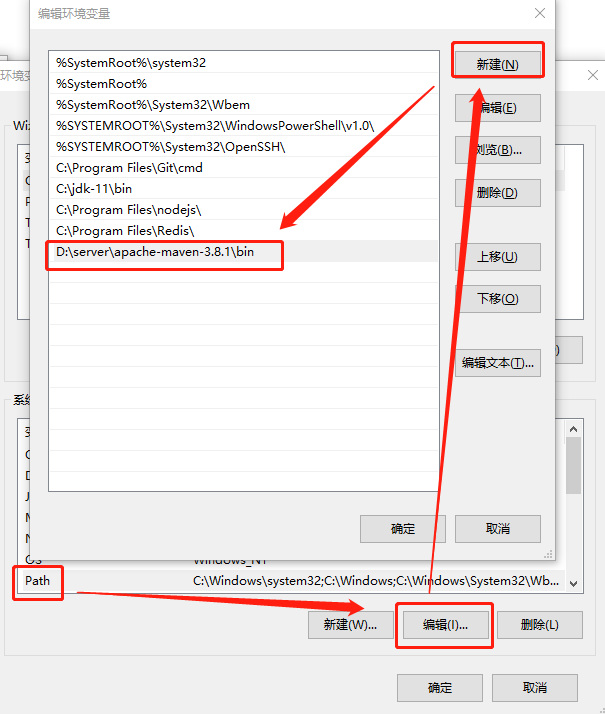
- Run
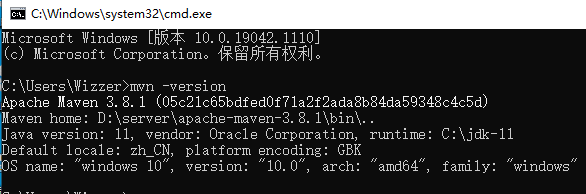
cmd->mvn -versionto check if Maven is installed correctly
# Maven Repository Configuration
- If you have configured a mirror repository, such as Alibaba's mirror repository, you should not configure
mirrorOfas * (asterisk represents all, whether release or snapshots, which will cause all third-party snapshot repository settings to be ineffective) in yoursettings.xml - The correct configuration is as follows:
<mirror>
    <id>nexus-aliyun</id>
    <mirrorOf>central</mirrorOf>
    <n>Nexus aliyun</n>
    <url>http://maven.aliyun.com/nexus/content/groups/public</url>
</mirror>
# Git Installation and Configuration
# Download Git
- 64-bit Git for Windows Setup https://git-scm.com/ (opens new window)
# Create Repository
Using https://gitee.com (opens new window) as an example to demonstrate the process of creating a repository, configuring SSH keys, creating a repository, and submitting documents.
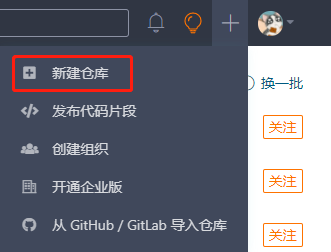
- Select
New Repositoryin the upper right corner of the homepage
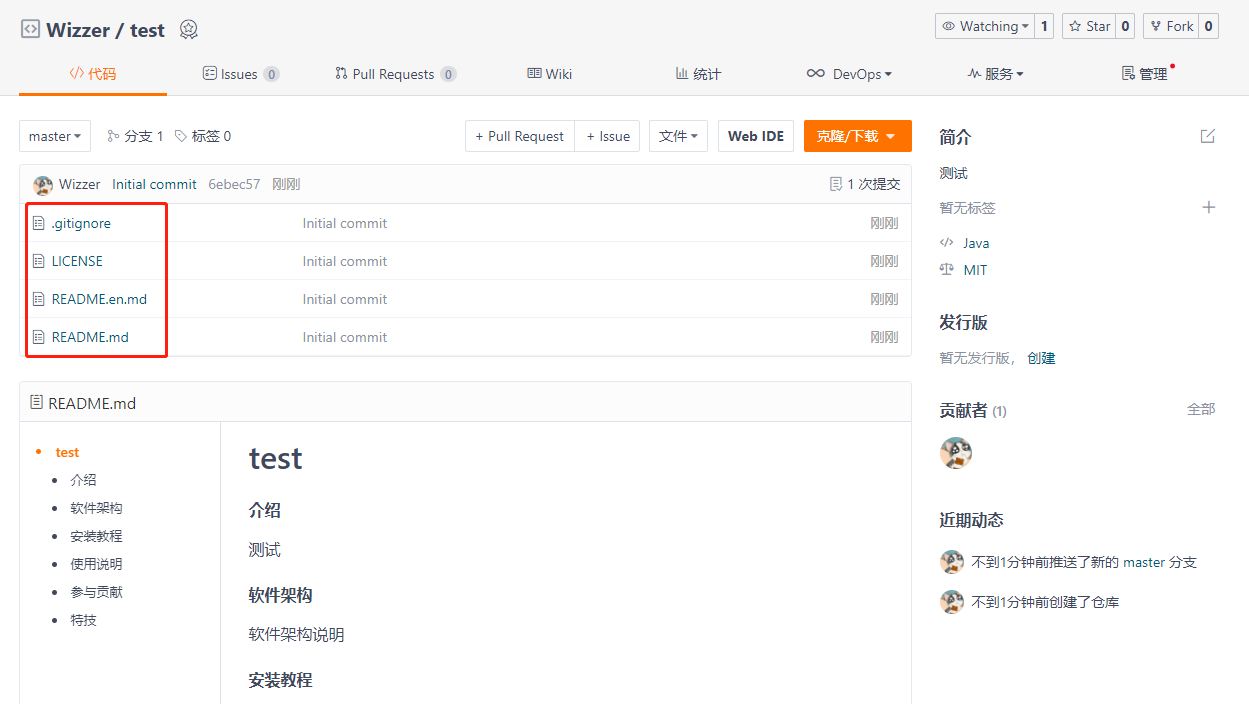
- Select
Development Language,.gitignore configuration file to ignore submissions,Open Source License, setReadme fileto create

- Creation complete
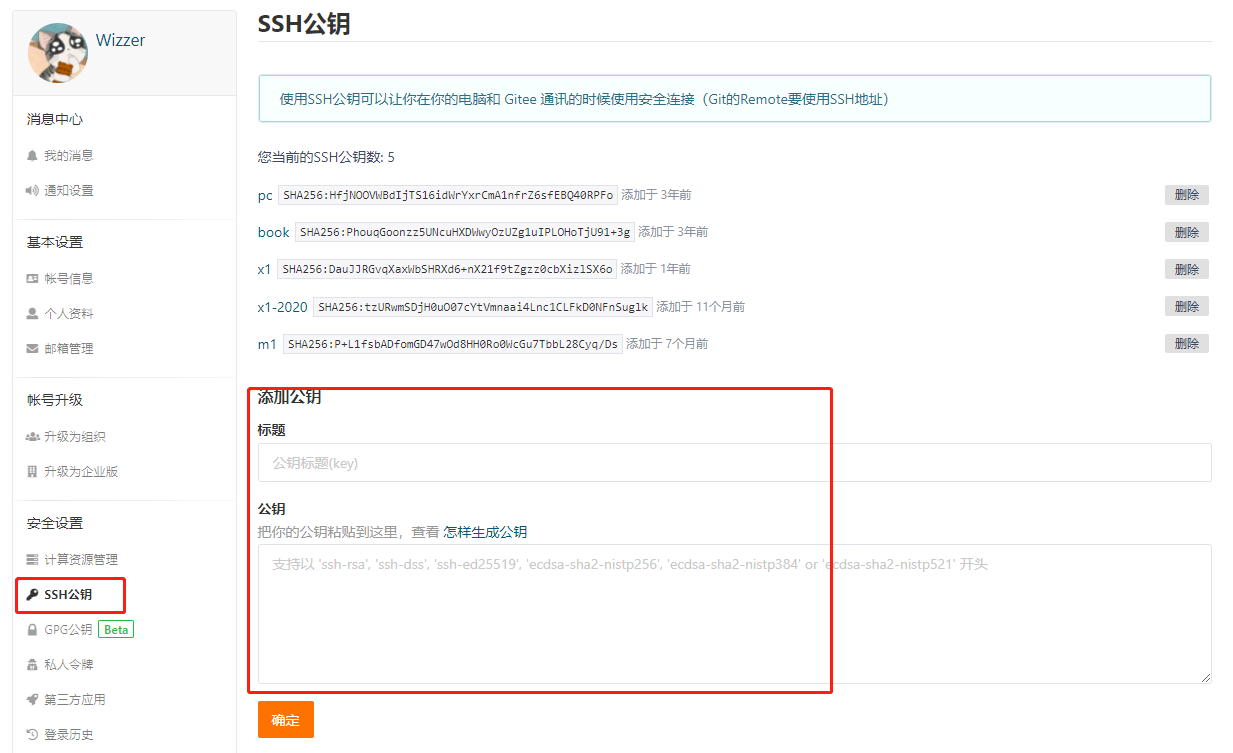
- Click
Settingsin the upper right corner, selectSSH Public Key, generate and configure the SSH public key, and then you can submit files on your computer
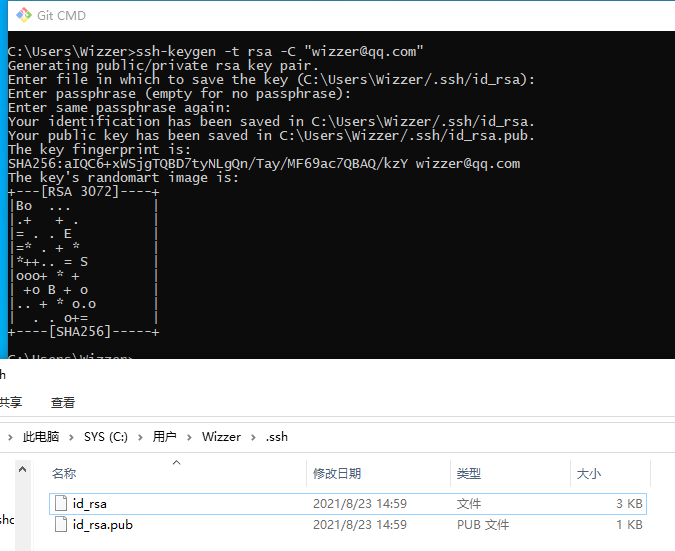
# Generate SSH Public Key
Documentation https://gitee.com/help/articles/4181 (opens new window)
Open the
Git CMDcommand line and enter the following (remember to change the email address to your own):
ssh-keygen -t rsa -C "wizzer@qq.com"
- For the 2nd line asking whether to rename, press Enter directly; for the 3rd line asking whether to set a password, press Enter directly; for the 4th line asking to repeat the password, press Enter directly. This will create the
id_rsaprivate key file andid_rsa.pubpublic key file inC:\Users\ComputerName\.ssh
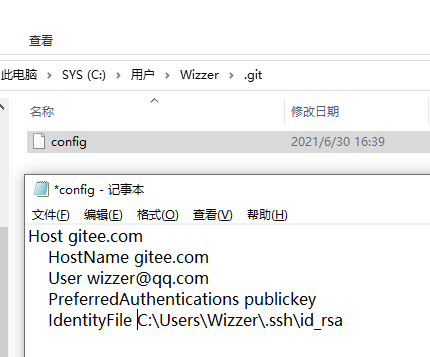
Open the
id_rsa.pubpublic key file with Notepad, copy the entire contents of the file and paste it into theSSH Public Keyin the user center of repositories likegiteeorgithubRight-click on your computer desktop, create a new text document, change the file name to
config(note: no extension), paste the following content, save and copy to theC:\Users\ComputerName\.sshdirectory
Host gitee.com
    HostName gitee.com
    User wizzer@qq.com
    PreferredAuthentications publickey
    IdentityFile C:\Users\Wizzer\.ssh\id_rsa
- Remember to change the email address to your own
# Git Commands
- Open the command line, switch to drive D, use
git cloneto clone project files
C:\>D:
D:\>mkdir java
D:\>cd java
D:\java>git clone git@gitee.com:wizzer/test.git

- Common Git Commands
git pull                    # Download updated files
git add 1.txt               # Add files to be committed
git commit -am "add: 1.txt" # Comment explaining the commit content
git push                    # Submit files
git status                  # Check status
# Node.js Installation and Configuration
# Download Node.js
Index of /dist https://nodejs.org/dist/ (opens new window)
Find
v19.2.0, download thenode-v19.2.0-win-x64.zipfile, and install itThe frontend Vue3 project
wk-vue3-adminis compatible with Node.jsv16.xv18.xv19.xversions, please test higher versions yourself